Connect your own domain to your Runable website with automatic SSL.
Every deployed website gets a subdomain at yoursite.runable.site. You can also connect your own domain (like yourdomain.com) with automatic SSL certificate provisioning.
Go to the chat where your website was built. Click the Dashboard tab in the website header, then select Domains from the sidebar.
2
Enter your domain
Type your custom domain in the domain field. This can be a root domain (yourdomain.com) or a subdomain (app.yourdomain.com).
3
Add the TXT verification record
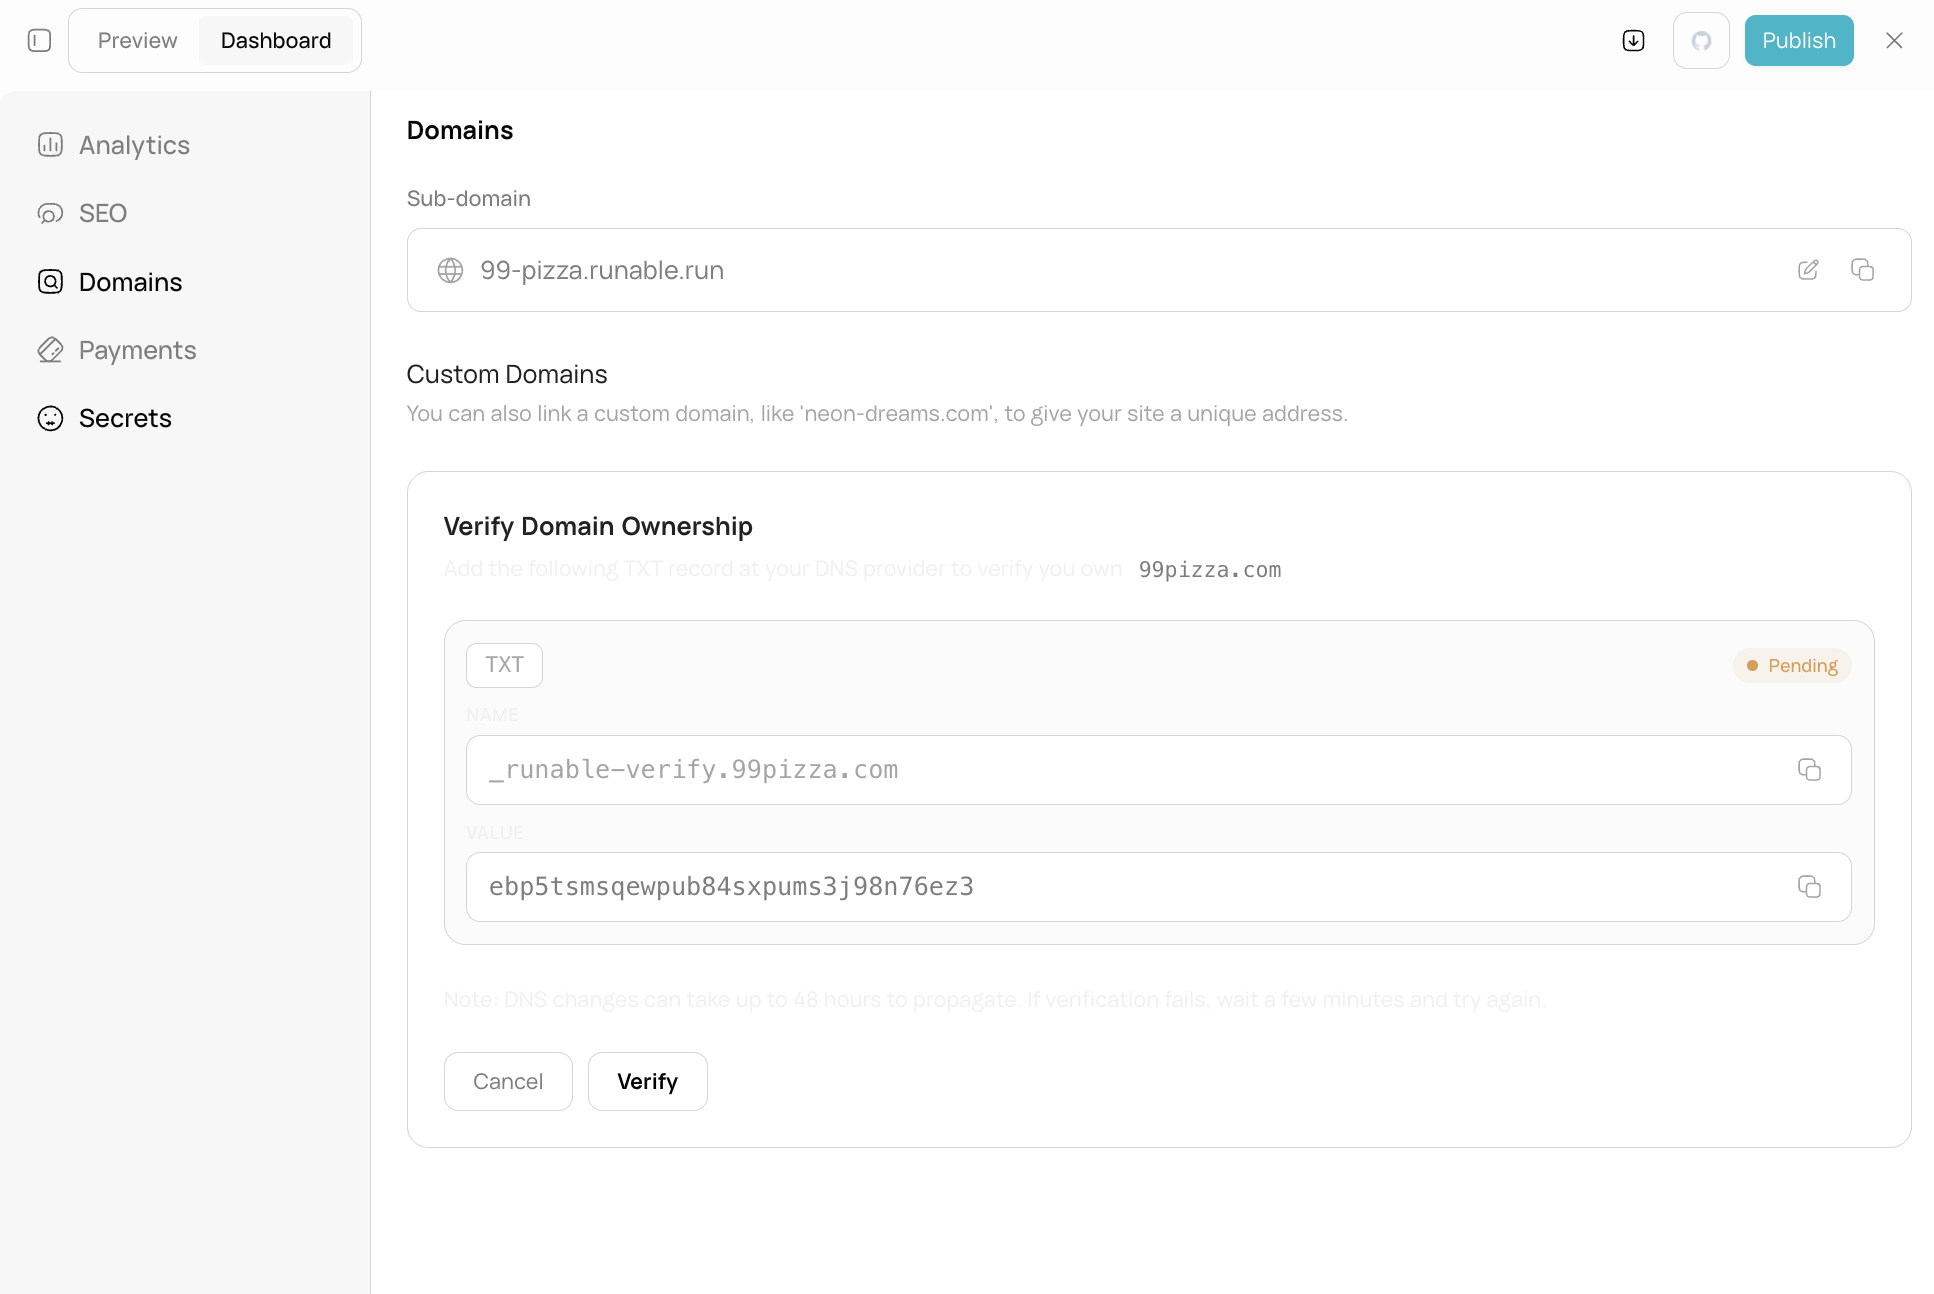
Runable generates a TXT record you need to add at your DNS provider. This proves you own the domain.
Record type
Name
Value
TXT
_runable-verify.yourdomain.com
Your deployment ID (shown in the dashboard)
Add this record at your DNS provider (Cloudflare, Namecheap, GoDaddy, Google Domains, etc.) and click Verify.
The domain verification step showing the TXT record to add.
4
Add DNS records to point your domain
After verification, add the DNS records to route traffic to your Runable website:For a subdomain (app.yourdomain.com):
Record type
Name
Value
CNAME
app
fallback.runable.site
For a root domain (yourdomain.com):
Record type
Name
Value
A
@
Cloudflare IP addresses (shown in the dashboard)
5
Wait for SSL
SSL certificates are provisioned automatically once DNS records propagate. This usually takes a few minutes but can take up to 24 hours depending on your DNS provider.The dashboard shows the SSL status. Once active, your site is accessible at https://yourdomain.com.
DNS propagation can take anywhere from a few minutes to 24 hours. If verification fails, wait and try again.